Daikin multi-connection line guide
Notice!
Please pay attention to electricity safety to prevent electric shock, please disconnect the main power supply of the air conditioner before wiring!
DAIKIN Duct Unit CN2(four-core)
Notice!
Please pay attention to electricity safety to prevent electric shock, please disconnect the main power supply of the air conditioner before wiring!
DAIKIN Duct Unit CN2(four-core)


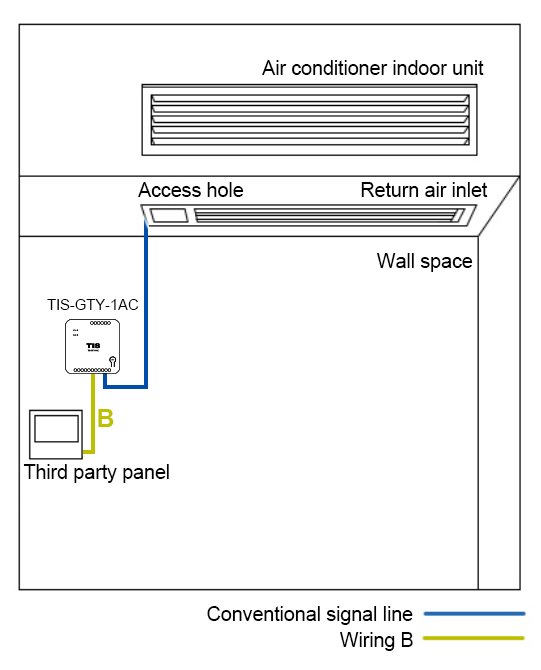
TIS-GTY-1AC installation position and laying-out requirements (Daikin multi-connection)
TIS-GTY-1AC installation location and wiring requirements
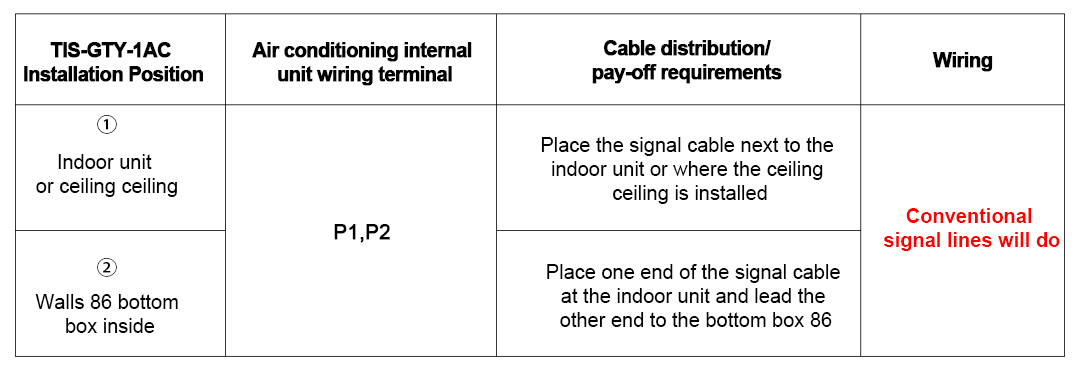
Precautions
※The installation position of TIS-GTY-1AC is determined by the actual scene, optional ① or ②
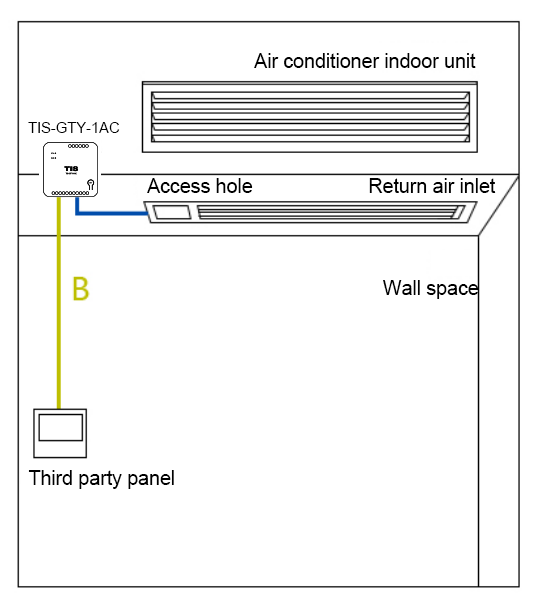
※When connecting to a third-party panel, you need to purchase wiring B separately (the standard length is 15cm, please continue the wiring yourself according to the actual distance), wiring B is an optional accessory, please contact us to purchase
Option One
TIS-GTY-1AC is installed next to the indoor unit or at the ceiling
(Wiring diagram)
Option two
TIS-GTY-1AC is installed in the panel 86 bottom box
(Wiring diagram)